Nightscout in Render
Too complicated? Not what you’re looking for?
Consider a hosted Nightscout service! Check for easier solutions here.
Render

You can create your Nightscout site in Render.
Pros:
No credit card required
Cons:
The free plan doesn’t guarantee any reliability
App will sleep after 15 minutes
Render URLs are considered unsafe by some internet providers
Relying on the MongoDB Atlas database
Step 0: Create a database
Render doesn’t include a database
Make sure you created one before starting your Nightscout web app creation with Render. Come back here when you have a MONGODB_URI connection string.
Migrating?
Copy the connection string from your previous platform: edit the variables and look for MONGODB_URI.
If you don’t see MONGODB_URI but see MONGO_CONNECTION (NOT MONGO_COLLECTION): use its value.
Step 1: Create a GitHub account and fork the Nightscout project
Continue with Step 2.
Create a GitHub account
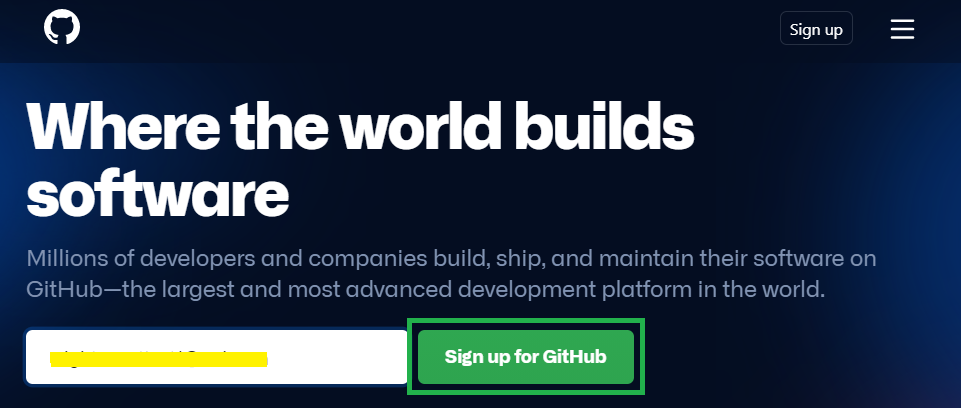
a) Click this link to create a GitHub account: https://github.com/
Enter your email and click Sign up for GitHub
b) Enter a password and a username (anything you want and that is accepted, not very important).
Type n to decline advertisement emails.
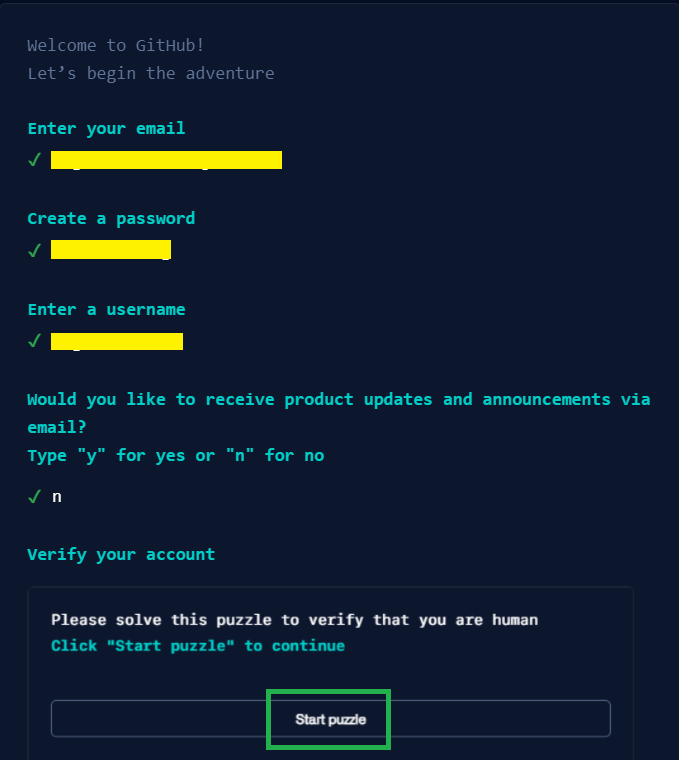
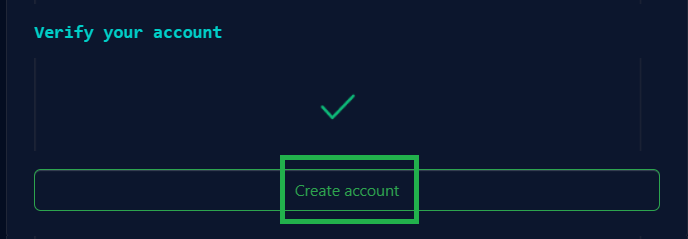
c) Play and solve the puzzle then click Create account
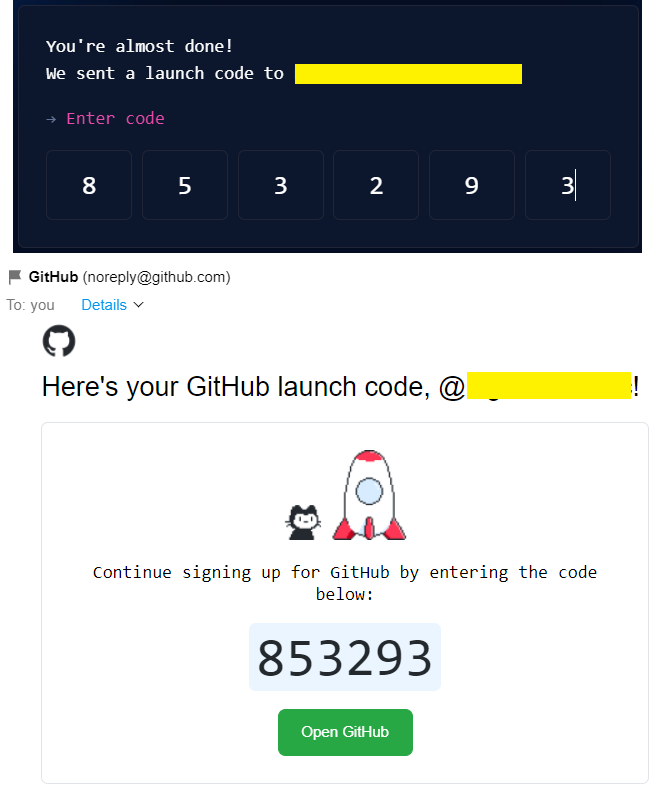
d) GitHub will send you a verification code. Open your mail and check your inbox (check your spam-folder if not received after a couple of minutes).
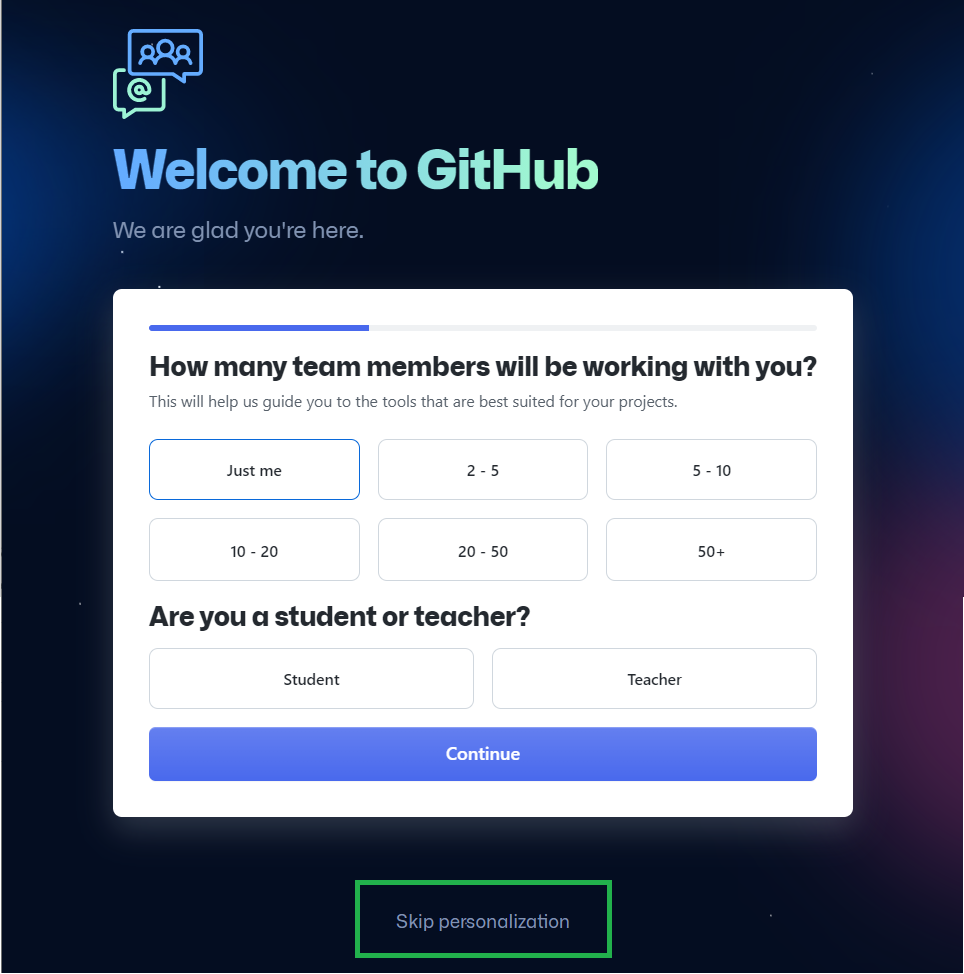
e) If a personalization sequence starts, click Skip personalization at the bottom.
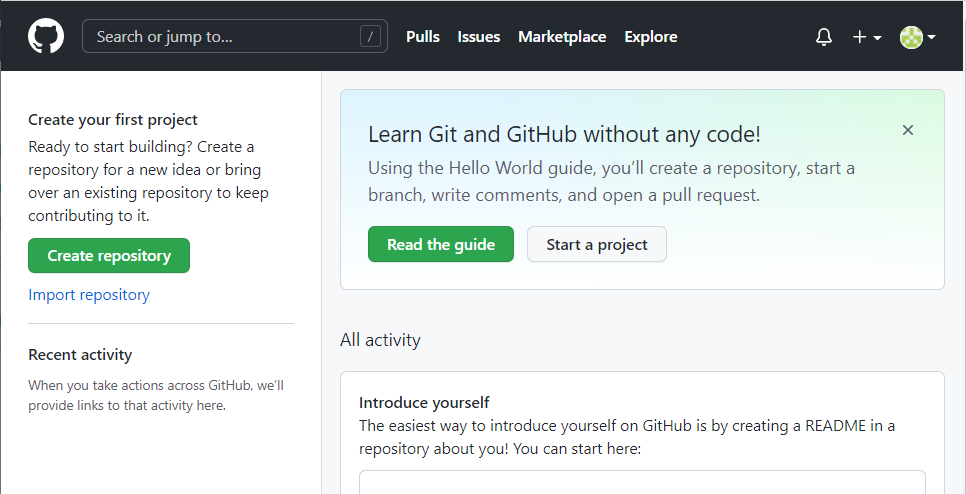
f) Leave the page that opened as it is. Don’t close it.
You have created your GitHub account. Now fork the Nightscout project.
Fork the Nightscout project
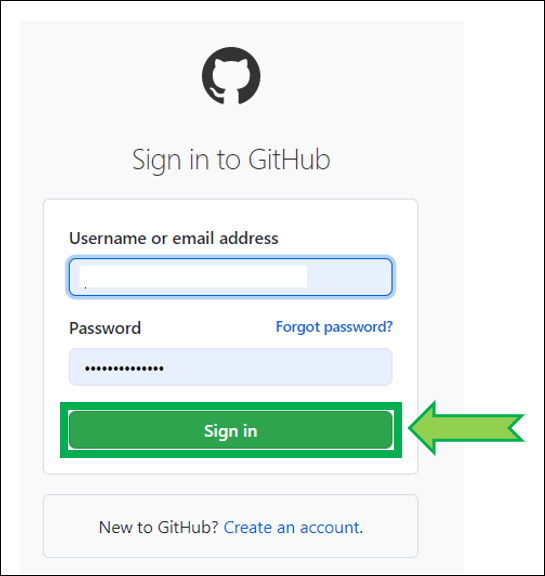
a) Click here to log in at GitHub: https://github.com/login.
Enter your username or email and your password. Click Sign in
If you already have a fork of cgm-remote-monitor in GitHub
Delete or update your current cgm-remote-monitor fork before continuing.
b) Open this link https://github.com/nightscout/cgm-remote-monitor. Click on Fork
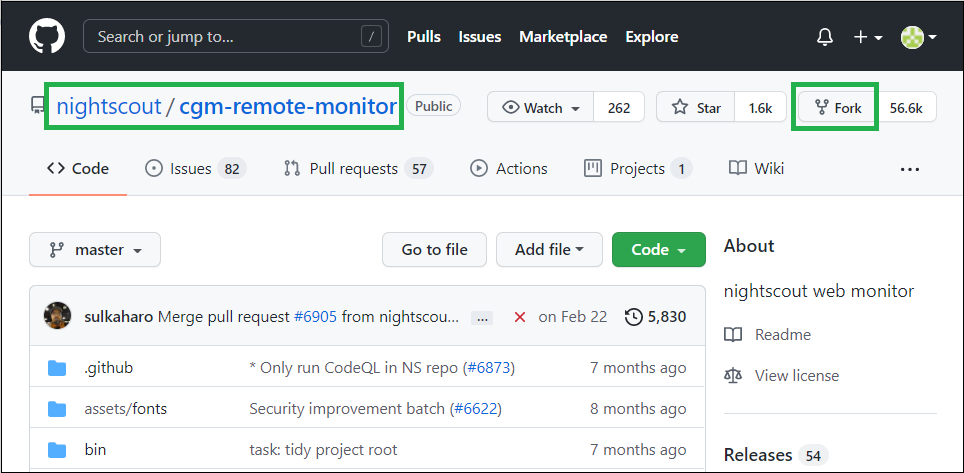
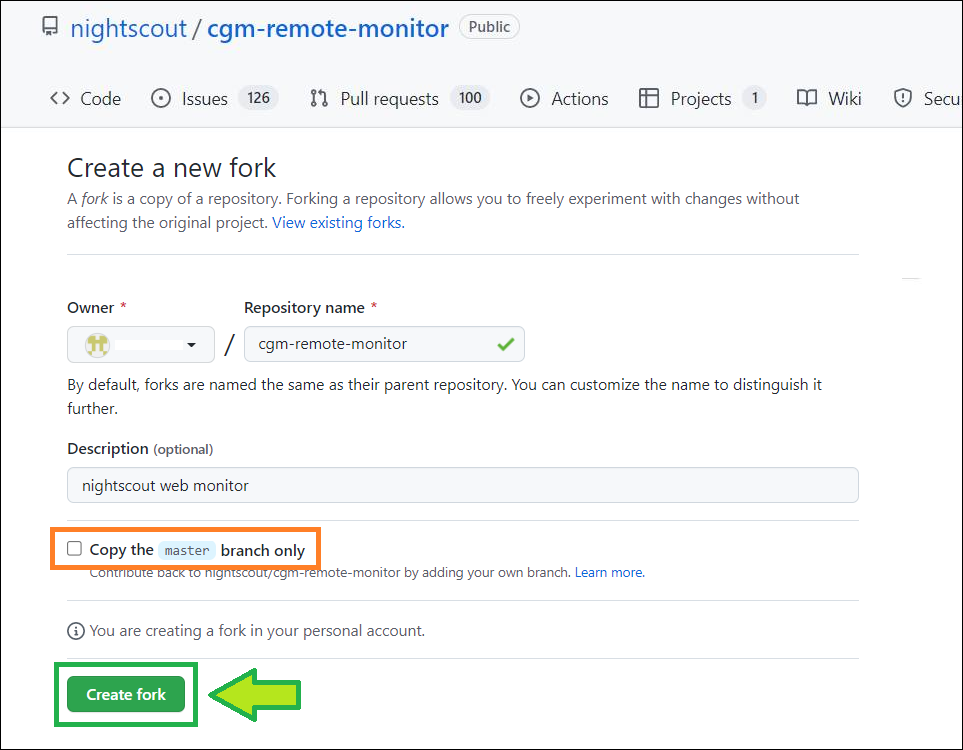
Confirm with Create fork
Warning
Make sure you deselect Copy the master branch only.
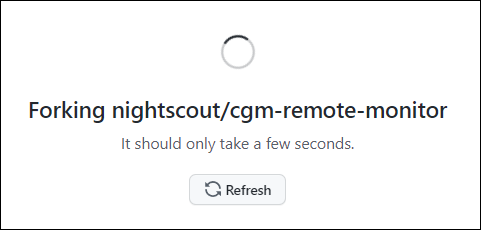
c) Wait for a moment
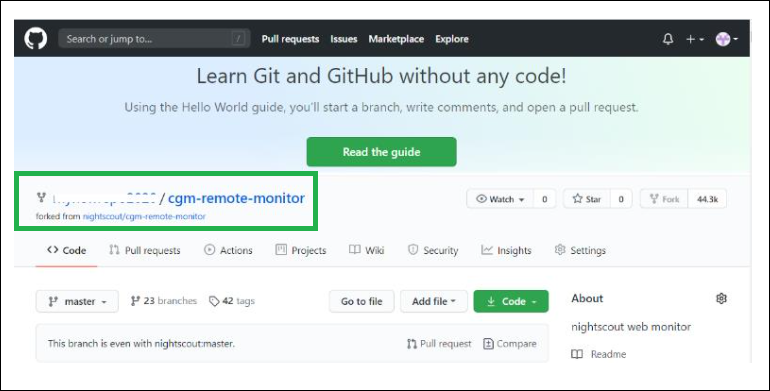
d) You now have a copy (fork) of the Nightscout project repository in your own GitHub.
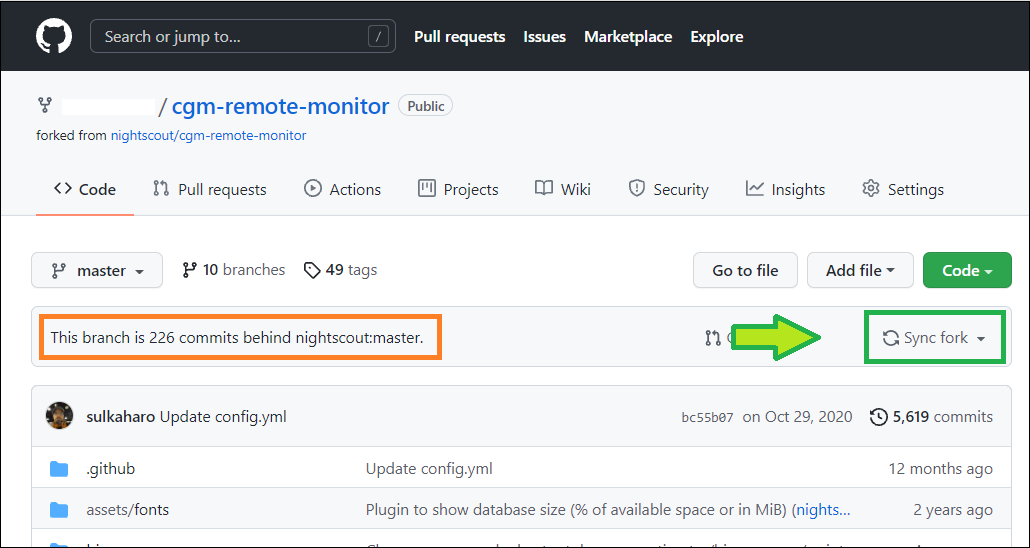
Update your Nightscout fork
Click here to log in at GitHub: https://github.com/login.
Enter your username or email and your password. Click
Sign in
Select your own
cgm-remote-monitorproject (notnightscout/cgm-remote-monitor)

Your repository will open. If you see
This branch is xxx commits behind nightscout:masteryou need to update.Select
Fetch upstream
Select
Fetch and merge
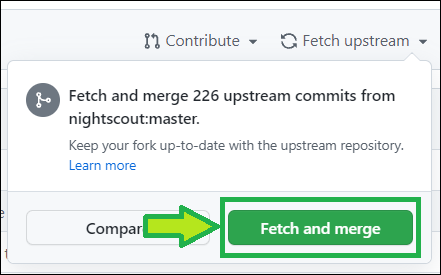
After a moment, your repository should display
This branch is up to date with nightscout:master
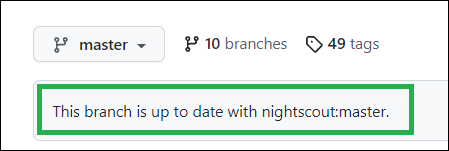
You have now updated your GitHub cgm-remote-monitor repository.
If you ran into trouble, you can redeploy the project.
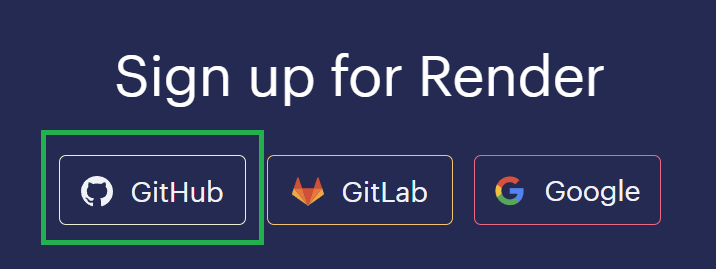
Step 2: Create a Render account
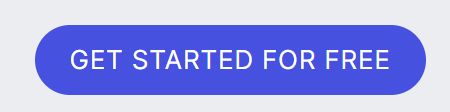
a) Open a new browser page in Render and select GET STARTED FOR FREE
b) Sign up with GitHub
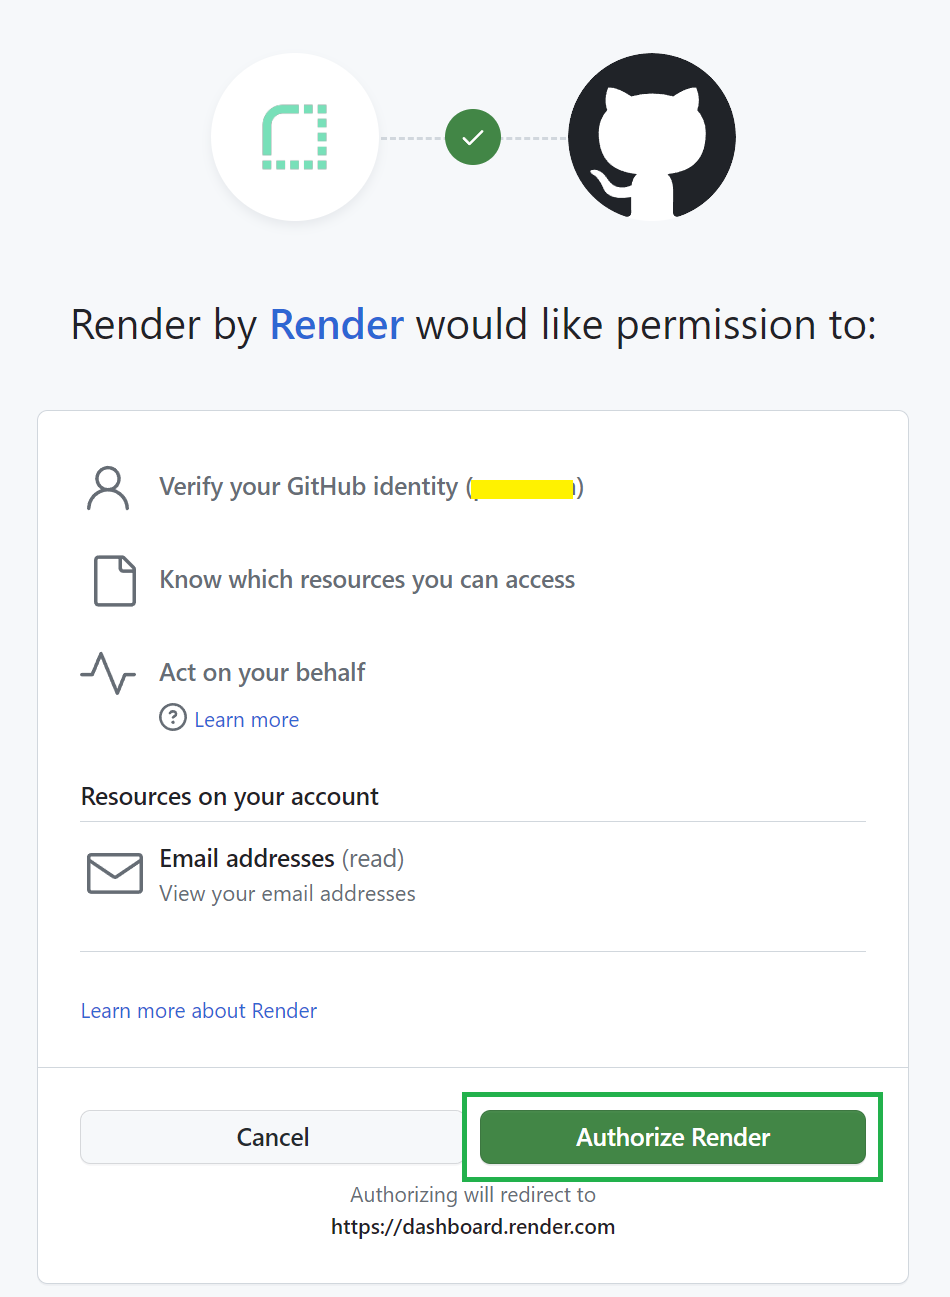
c) Authorize Render
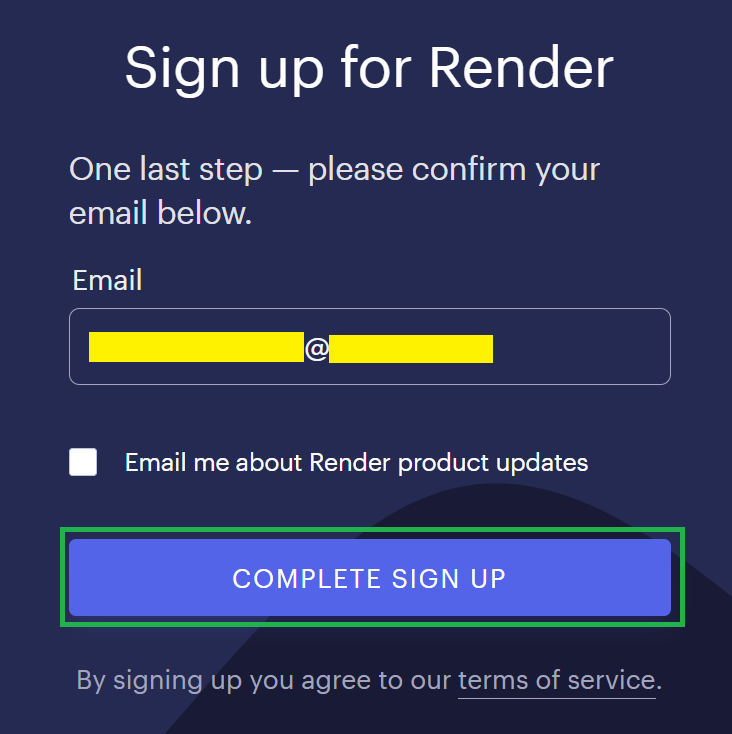
d) COMPLETE SIGN UP with your GitHub account email
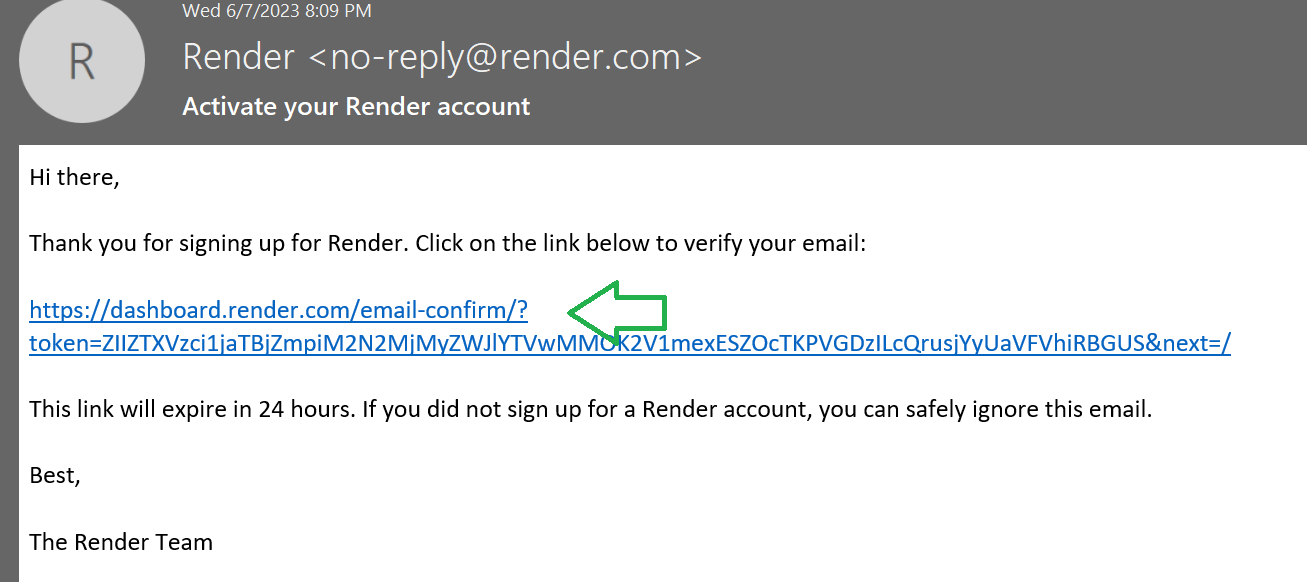
e) Check your inbox and click the confirmation link
Step 3 - Deploy Nightscout in Render
Select below how you want to do this:
Step 4: Create your Nightscout service
From the dashboard, create a new Web Service.

Select
Deploy an existing image from a registrythenNext.

In the field
Image URLtype:
nightscout/cgm-remote-monitor:latest
Then Next.

In
Nameput the name of your Nightscout site (Render will add an extension if it’s not unique).

Select the
Regioncloser to where you live.

Select the
Freeinstance type, knowing it will fall asleep (we’ll fix that later on).

Clicking the button
+ Add Environment Variableadd the following two variables, and in the box on the right the matching value:
HOSTNAME	0.0.0.0
PORT		1337

You now need to setup core variables for your site:
Clicking the button
+ Add Environment Variableadd the following three variables:MONGODB_URIpaste your database connection string from Step 0 aboveAPI_SECRETwill be your Nightscout site password, it needs to be at least 12 characters long and you should NOT use spaces if you use @ or ! symbols remember you will probably need to express them using Percent encoding in your uploader and downloader apps. If you’re not sure on how to do this, it is recommended to use only letters (uppercase + lowercase) and digits.
Warning
The API_SECRET is the main password allowing full access to your Nightscout site. Make sure it’s reasonably secure (mix uppercase and lowercase letters, plus digits) and do no not share it publicly. If you think you exposed it by mistake, it is recommended that you change it.
Define your
DISPLAY_UNITS
Acceptable choices for the units used in Nightscout are mg/dl or mmol/L (or just mmol).
Once all three variables have been set,
Create web Service

Your Nightscout site will be deployed. Wait until the operation completes after some minutes.


Congratulations. You created your new Nightscout site with Render.
Step 4: Add the render.yaml template
Sign in your GitHub account: https://github.com/login.
Select your own
cgm-remote-monitorproject.
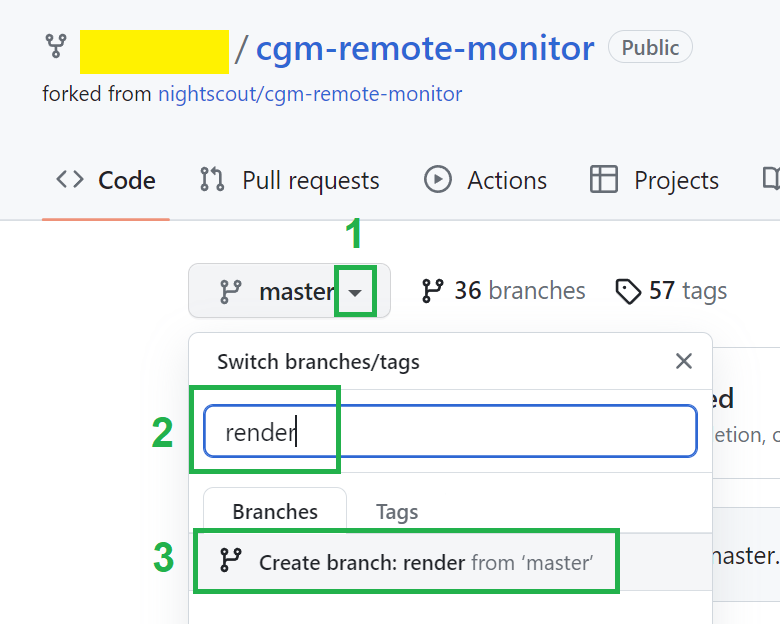
Open the branches list
Type
renderSelect Create a branch: render from ‘master’
Select Add File - Create new file
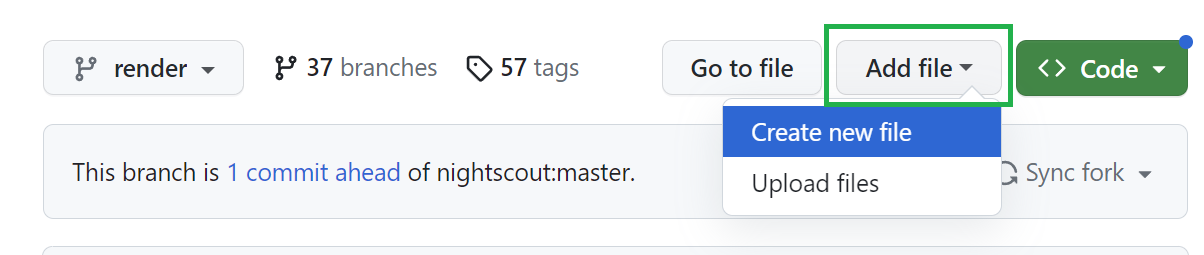
Type
render.yamlfor the name. Leave it open like that for now.
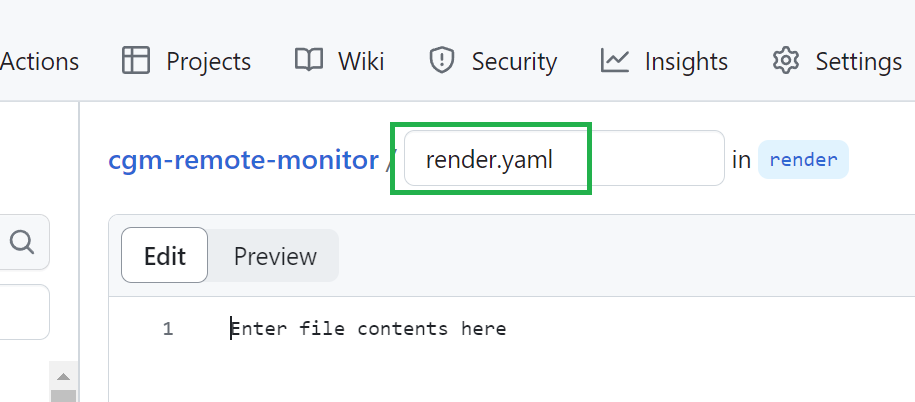
Open the
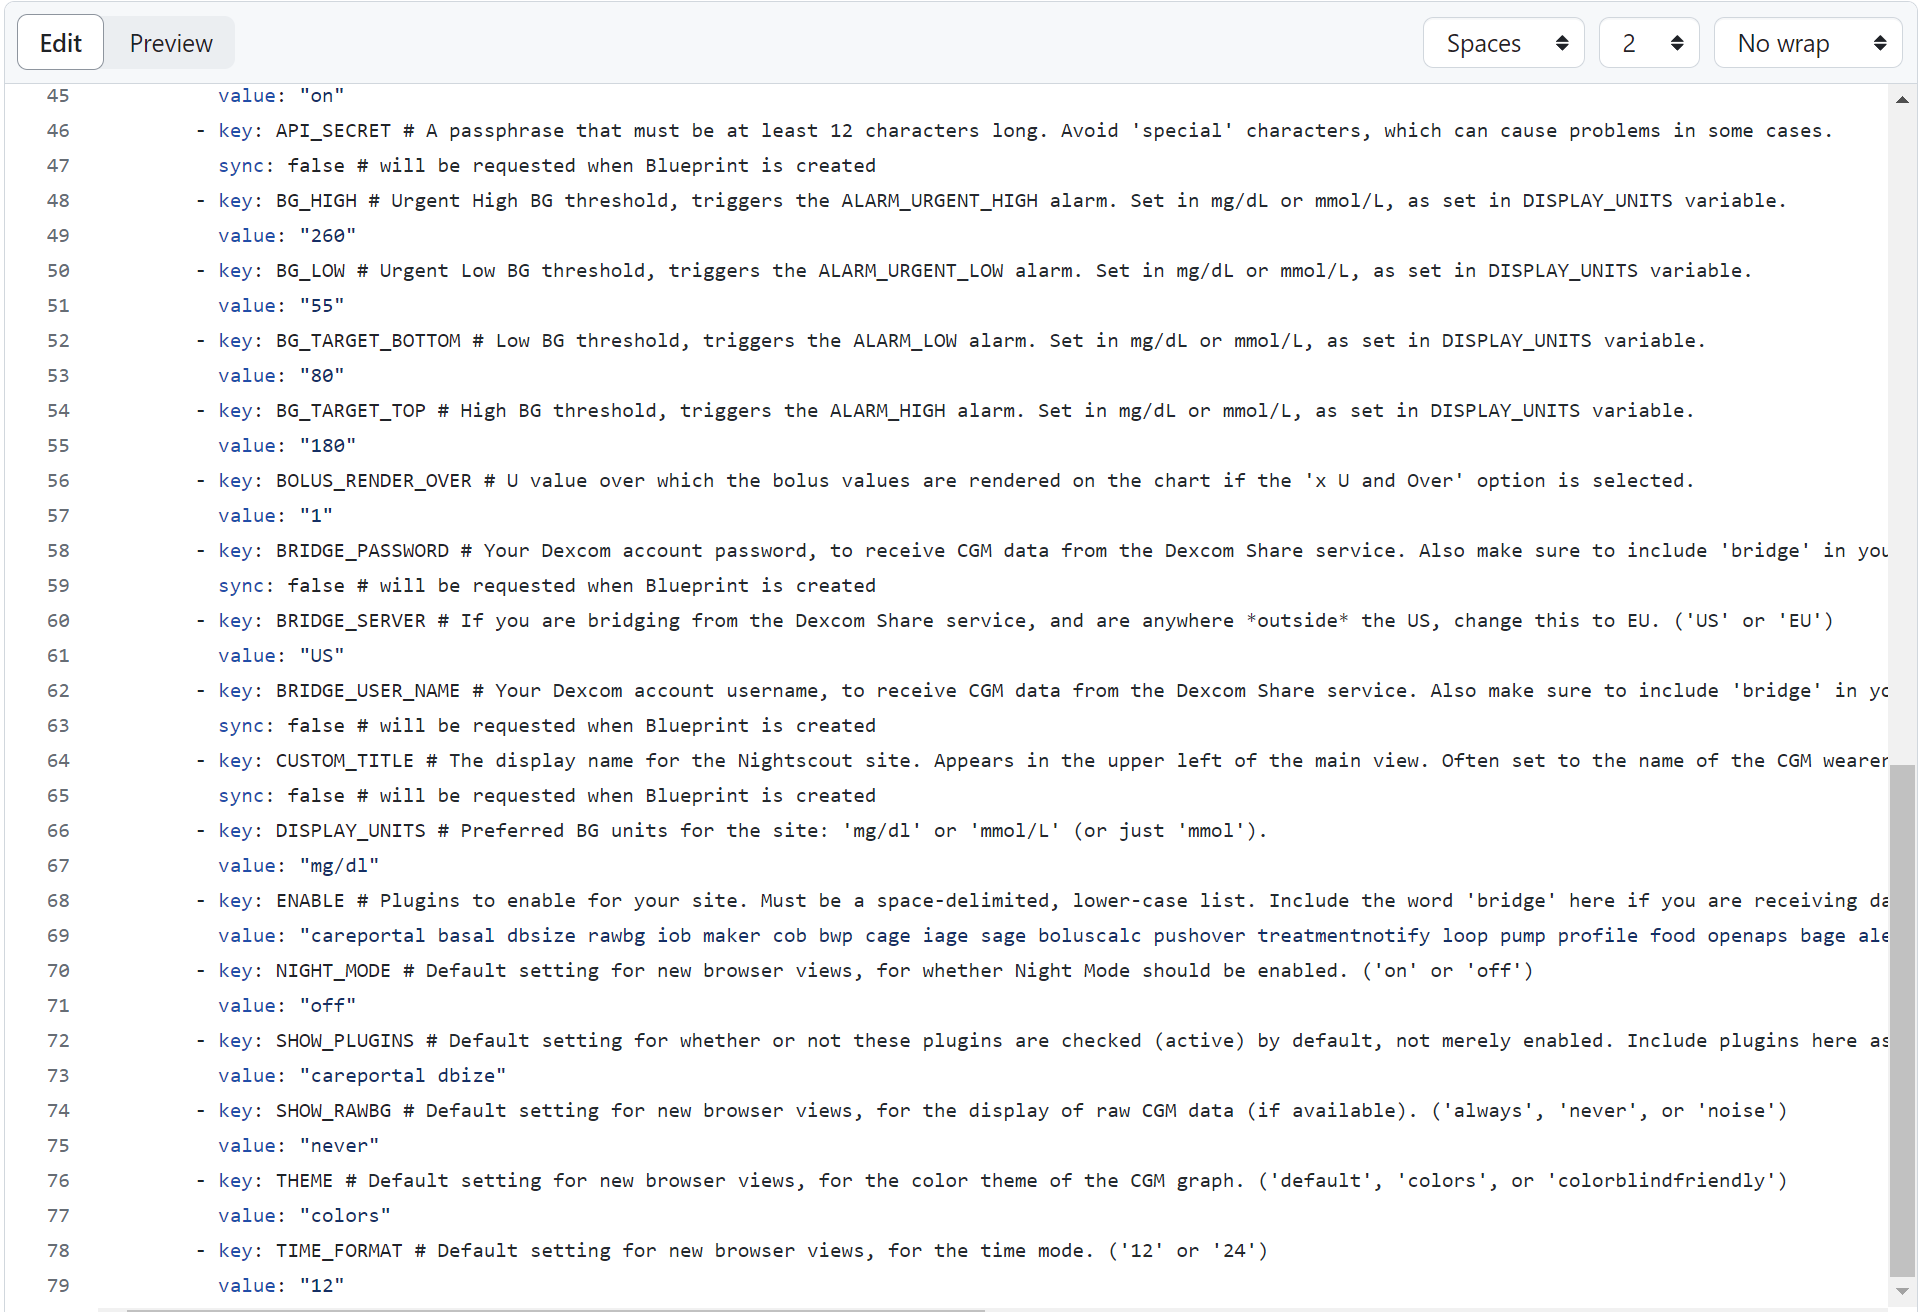
render.txttemplate from here and edit it with a notepad app, select all, copy and paste into the GitHub page you have open from above.
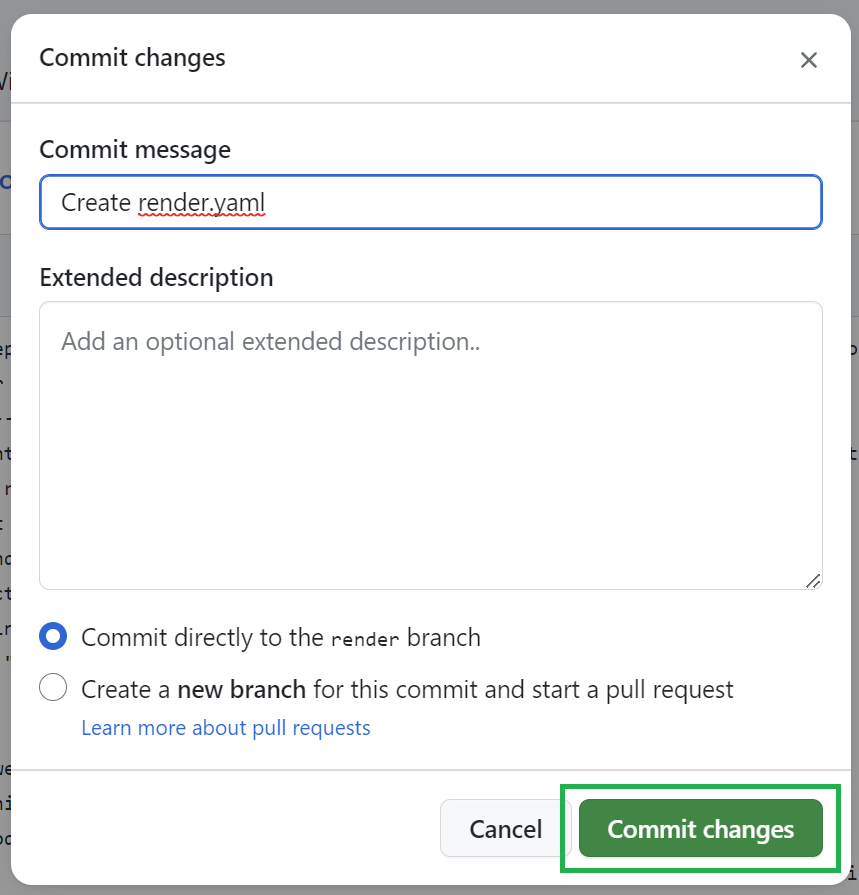
Scroll up the page in GitHub and select
Commit changestop right.

Confirm with
Commit changes.
Your cgm-remote-monitor project is ready for Render Blueprints deploy.
Step 5: First deploy in Render
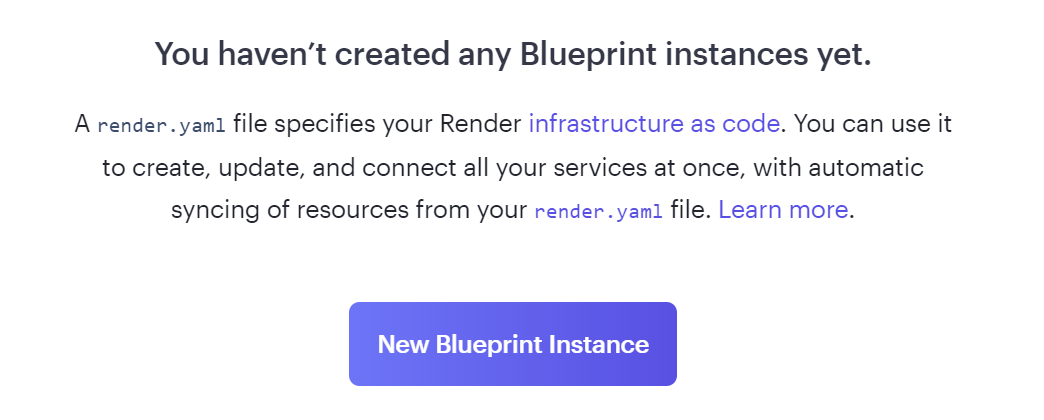
a) Select Blueprints

b) Then New blueprint instance
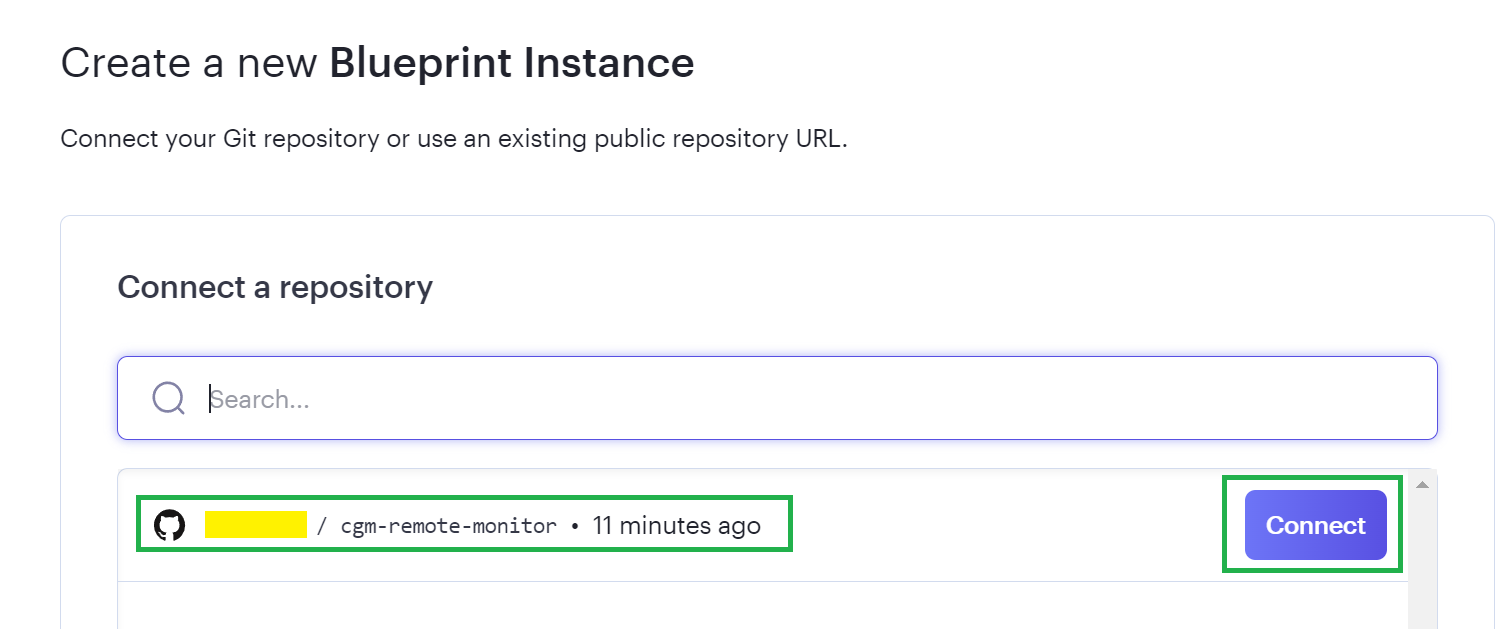
c) Connect your cgm-remote-monitor project
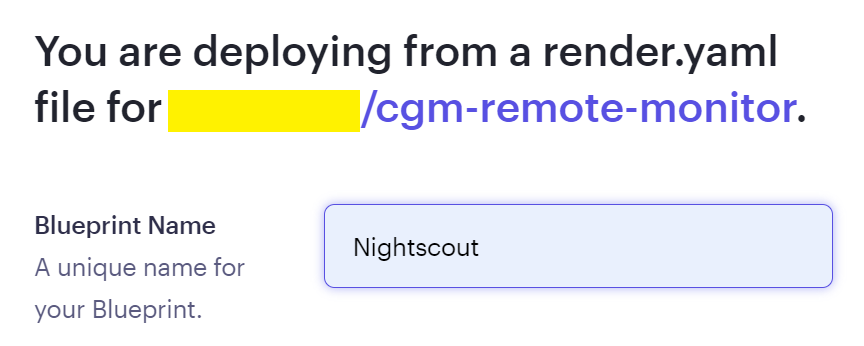
d) Enter a name for your blueprint (anything simple, Nightscout is ok)
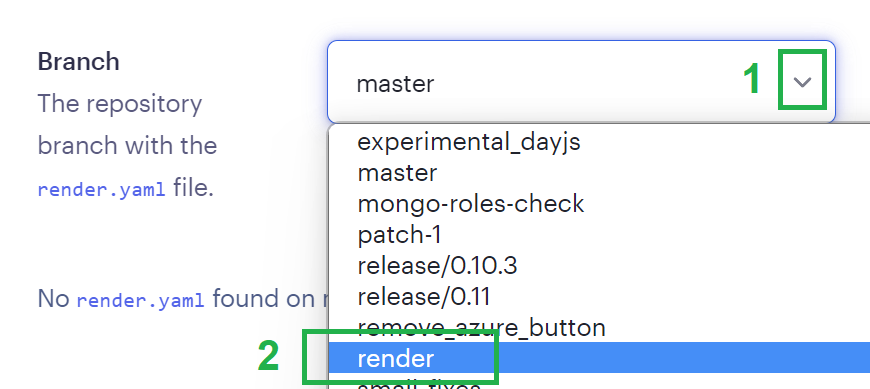
e) Click the drop down menu of Branch (1) then select render (2)
You now need to setup core variables for your site:
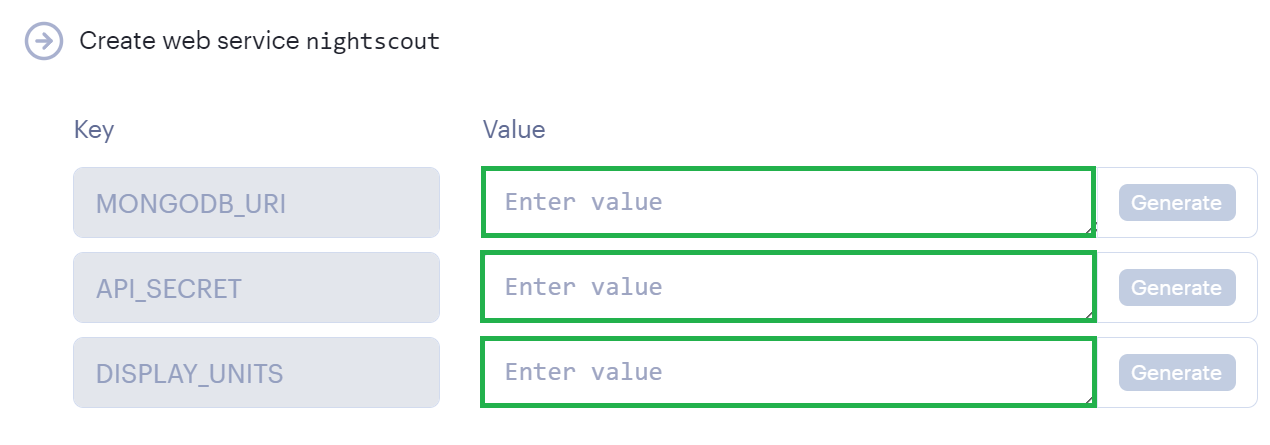
f) In MONGODB_URI paste your database connection string from Step 0 above
g) API_SECRET will be your Nightscout site password, it needs to be at least 12 characters long and you should NOT use spaces if you use @ or ! symbols remember you will probably need to express them using Percent encoding in your uploader and downloader apps. If you’re not sure on how to do this, it is recommended to use only letters (uppercase + lowercase) and digits.
Warning
The API_SECRET is the main password allowing full access to your Nightscout site. Make sure it’s reasonably secure (mix uppercase and lowercase letters, plus digits) and do no not share it publicly. If you think you exposed it by mistake, it is recommended that you change it.
h) Define your DISPLAY_UNITS
Acceptable choices for the units used in Nightscout are mg/dl or mmol/L (or just mmol).
i) Once all three variables have been set, Apply
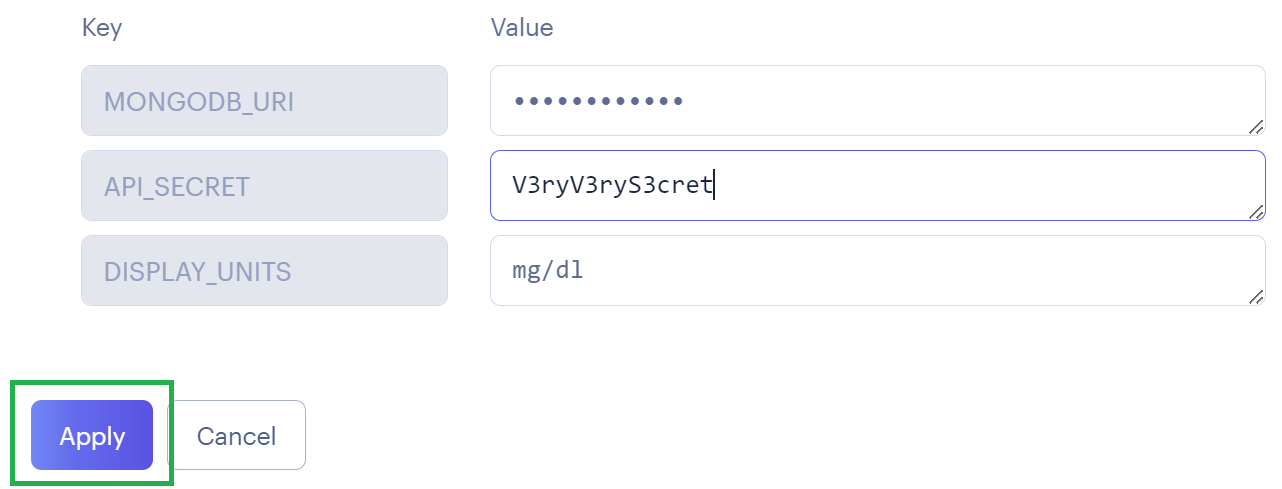
j) Your Nightscout site will be deployed. Wait until the operation completes after some minutes.
Congratulations. You created your new Nightscout site with Render.
The following step is important, don’t skip it.
Step 6: Delete the render branch
Hint
In order to deploy your site with a blueprint, you needed to modify your GitHub repository. Now you want to remove this modification so that you’ll be able to update it normally.
Sign in your GitHub account: https://github.com/login.
Select your own
cgm-remote-monitorproject.
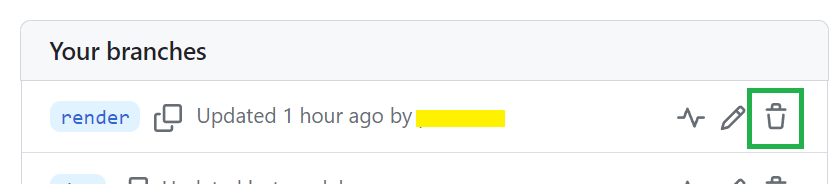
Click on branches to display all.
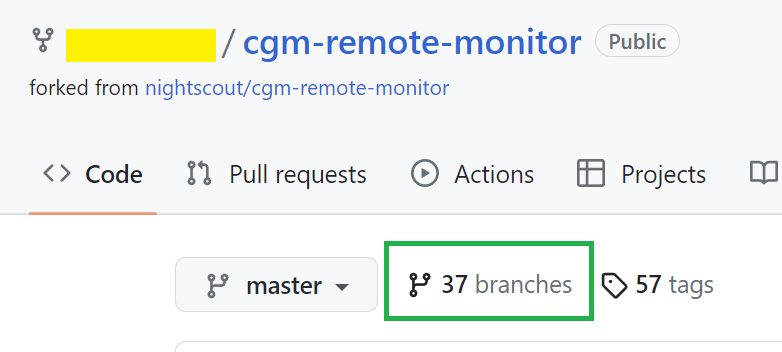
Locate the
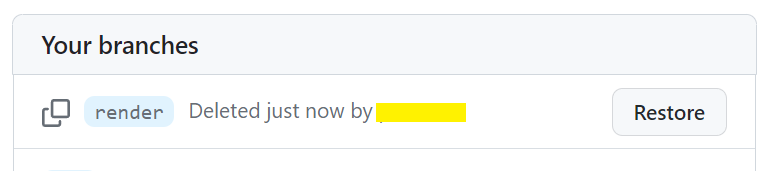
renderbranch and click on the bin icon to delete it.
You have successfully removed the temporary modification required to deploy a new Render site.
Your Render site will redeploy using the normal
masterbranch ofcgm-remote-monitor, wait a few minutes until the operation completes.
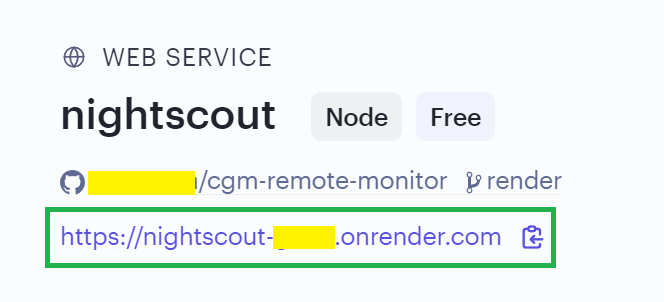
From the menu,
Dashboard, then select your web service.


This is your new Nightscout site, click on the URL to open it
New Nightscout Setup
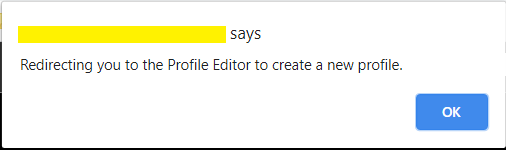
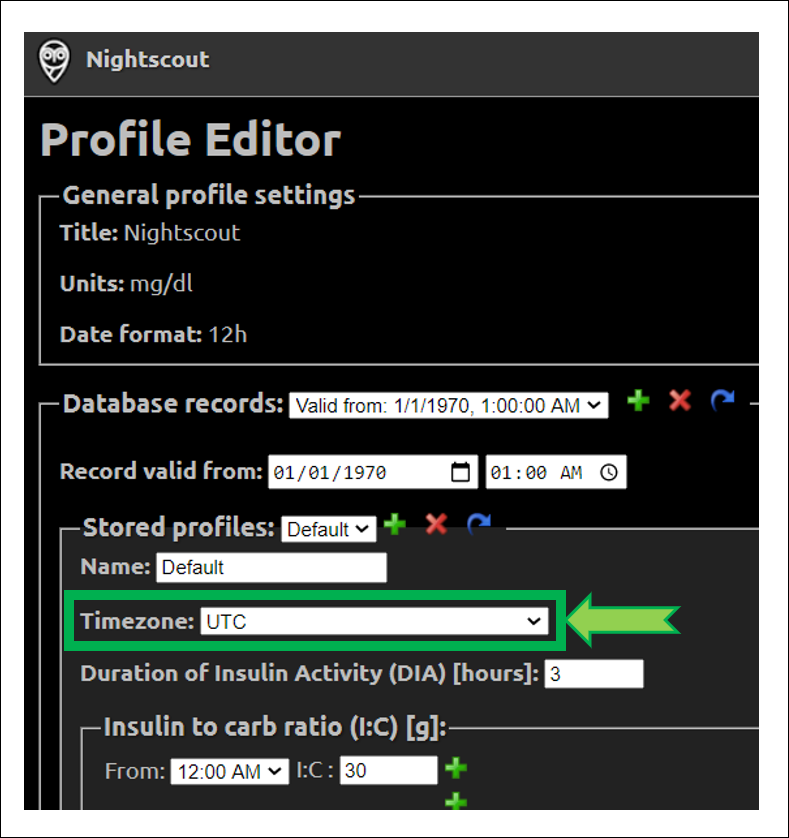
a) Your Nightscout site should open and direct you to a new profile creation.
b) Setup your Time zone and eventually all other fields. Do not leave any fields empty. If you don’t know which value to use, just use the default value. You can change these values later at any time.
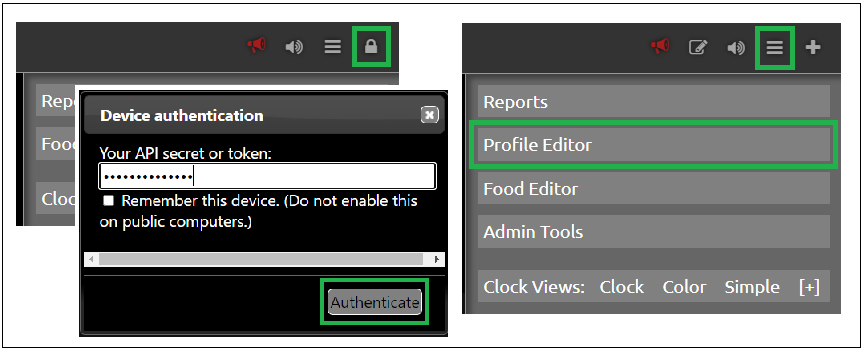
c) Browse down to Authentication status and click Authenticate. Enter your API secret. Click Update.
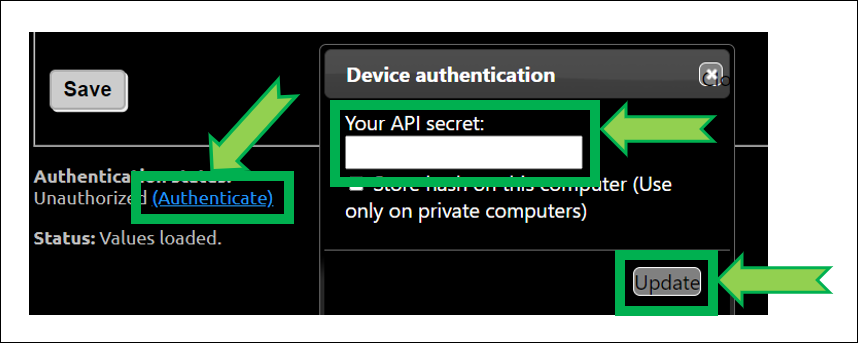
d) Click Save.
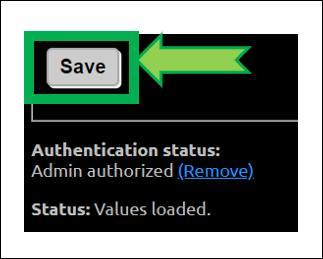
e) If the following pop-up shows up click OK, and check status (upper right of the window).
f) If you need to modify your profile after this, authenticate with the lock icon (top right of the page): enter your API secret. Then click on the hamburger menu and select Profile Editor.
Privacy warning
Anyone with access to the URL of your Nightscout site, can view your BG and run reports of your data. It it strongly recommended that you enable security to your site once you’re done with the setup
g) Dexcom Share users should see data flowing in after some minutes. xDrip+ users (including Medtronic CareLink followers) should setup the uploader as shown here. xDrip4iOS users here. AAPS and Loop: consult the relative documentation.
You have completed a new Nightscout site creation. You can continue here now.
The following section provides more information that you might not need to use now.
Editing Variables in Render
Log in Render
Select your web service
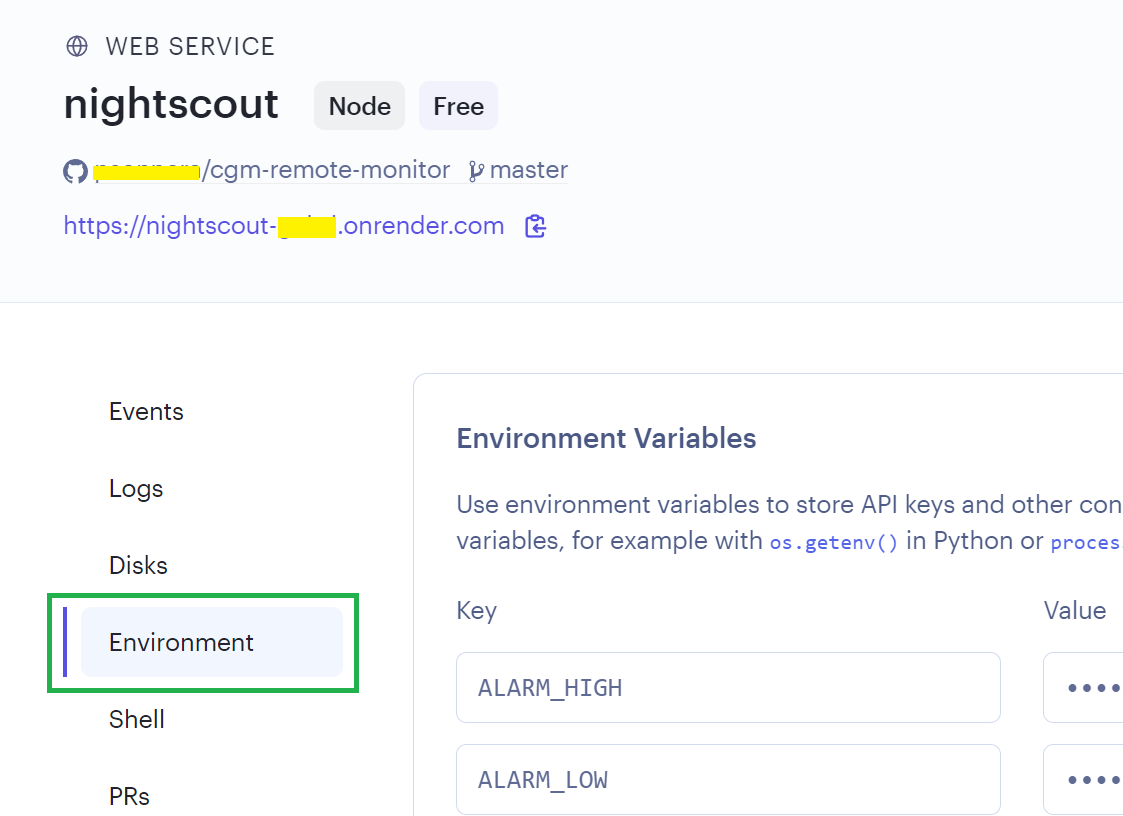
Go to
Environment, your variables will display
You can modify variables by making the changes directly in the text boxes.
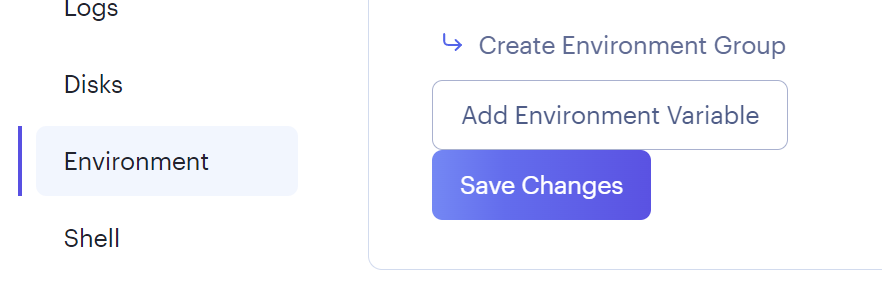
You can also add variables withAdd environment variable.
When you’re done, scroll down andSave changes.
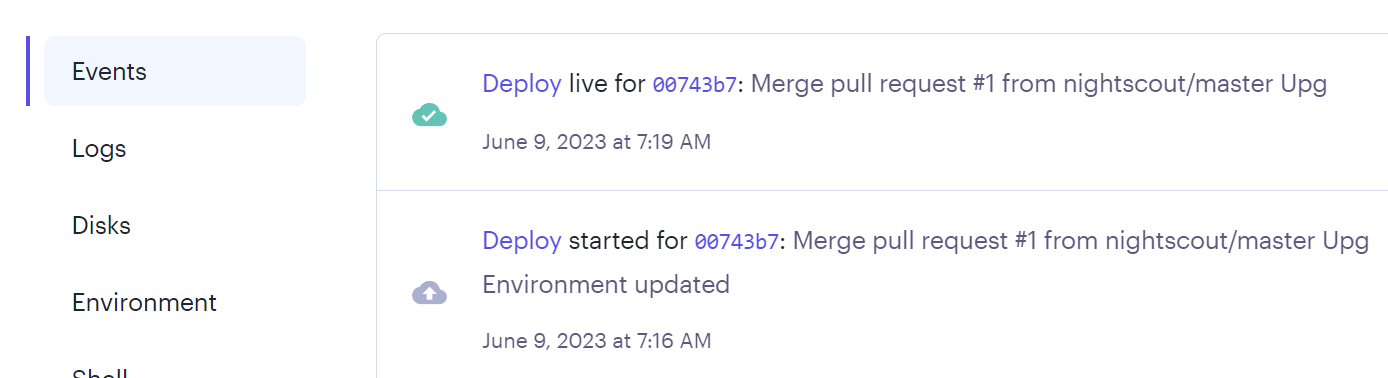
Wait a few minutes for your site to redeploy. You can track the status in
Events.