MongoDB Atlas Database
Too complicated? Not what you’re looking for?
Consider a hosted Nightscout service! Check for easier solutions here.
MongoDB Atlas Database

MongoDB bought mLab in 2018 and shutdown its service in 2020. Most users migrated to MongoDB Atlas, using a free M0 database with a limited 512MB capacity. Leaving the database grow uncontrolled usually leads to a Nightscout crash.
Pros:
The M0 cluster is free
Nightscout was adapted to MongoDB Atlas
Cons:
M0 clusters are designed for learning and testing, not production
There is no warranty the M0 cluster will remain in the future
A larger Flex cluster costs 8$ per month (consider hosted Nightscout)
A full M0 database crashes Nightscout, this is a common issue for DIY closed loop system users
Note
MongoDB Atlas regularly changes the site aspect. If you encounter a page not matching this documentation search for keywords like not now, skip or later to continue. Report discrepancies here.
Create an Atlas database
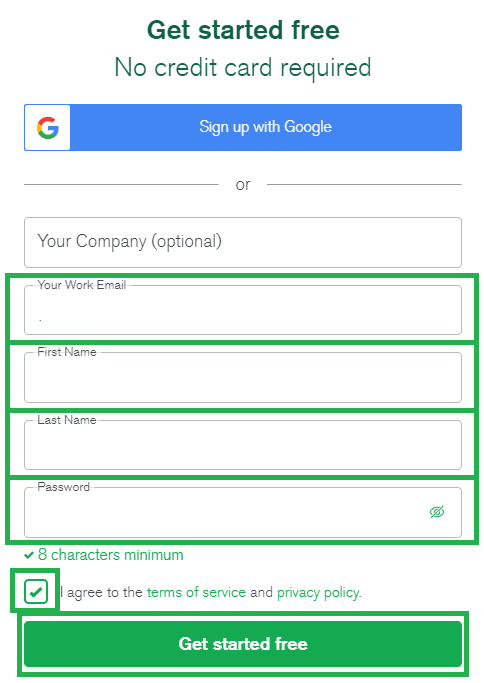
a) Open a browser tab at: https://www.mongodb.com/cloud/atlas/register
b) Enter your information, click Continue then Create account
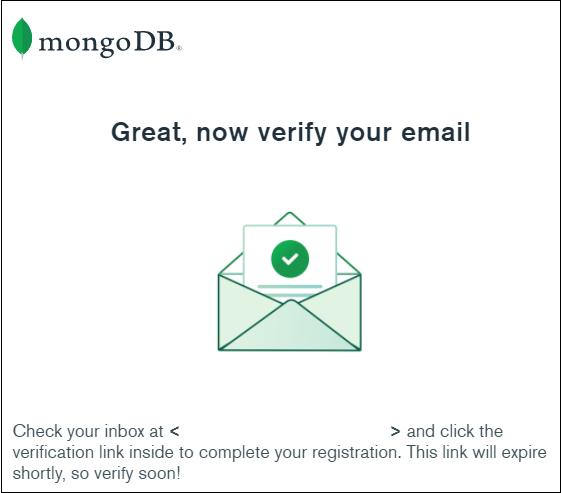
MongoDB Atlas will send you an email, if you don’t receive it check your Spam folder.
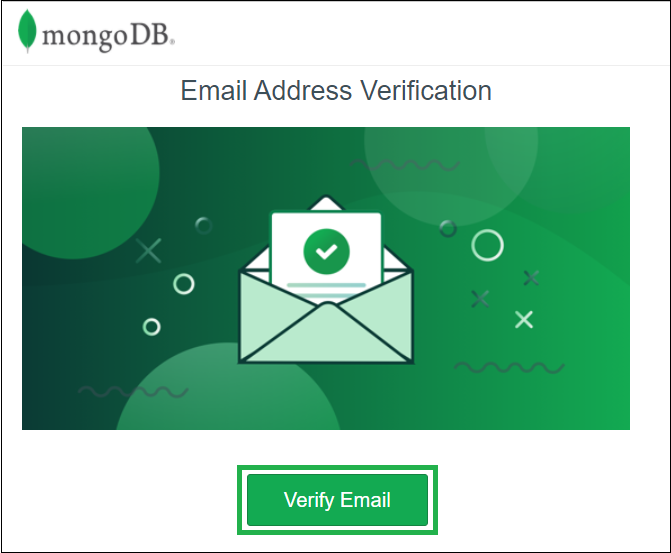
In the email you received from MongoDB Atlas (mongodb-atlas @ mongodb.com), click on Verify email
Another browser tab will open with your confirmed MongoDB account, Continue.
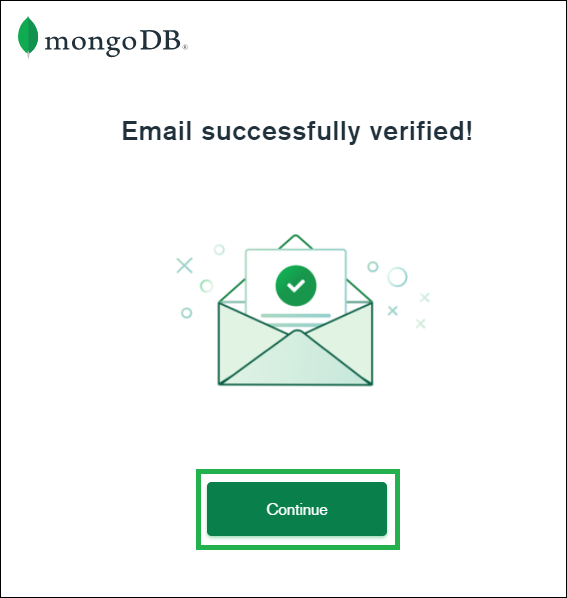
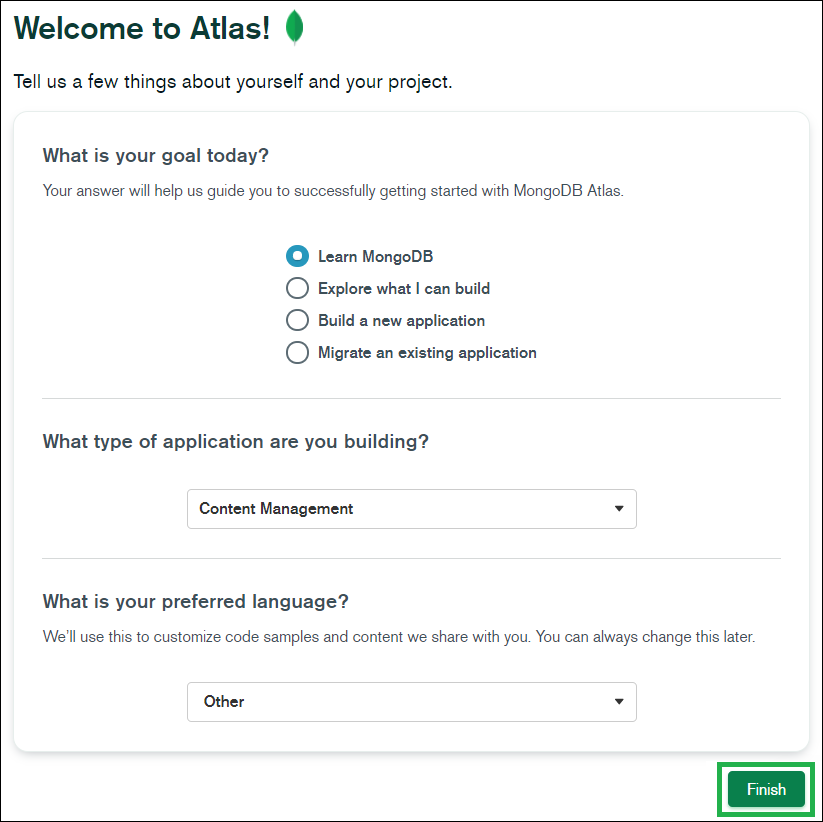
Enter some information (like below) and click Finish.
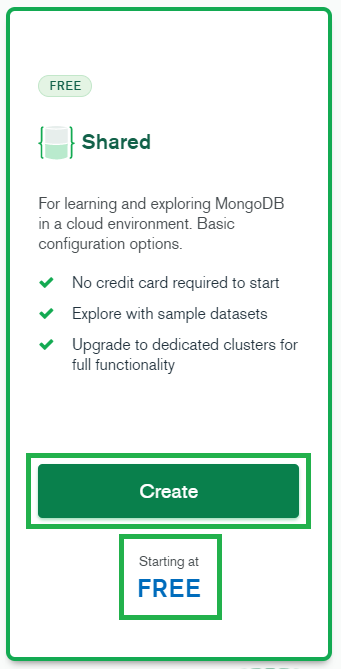
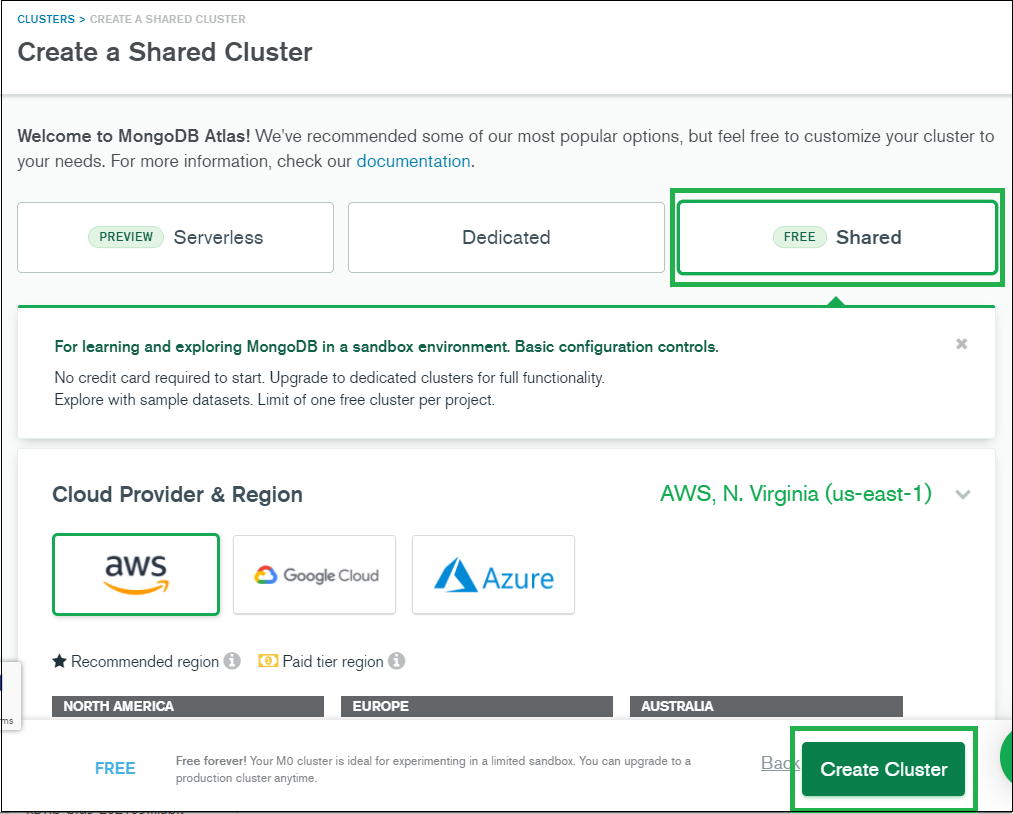
c) Select Create a cluster in Shared Clusters (FREE)
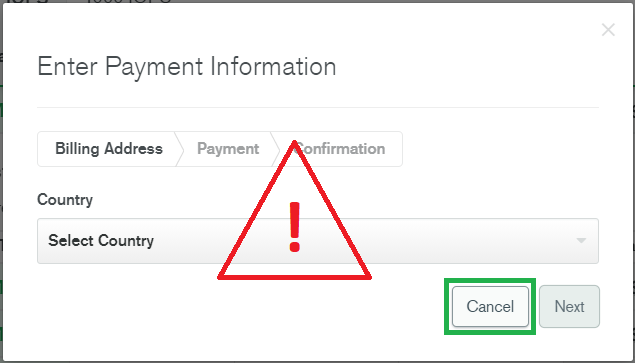
If you ever see this, just STOP
We’re building a free cluster: you don’t need to provide any billing information.
d) Check you selected Shared, leave all default values and click Create Cluster
e) Select Username and Password and invent a database username (for example nightscout) and a database password (for example soo5ecret but please make one that’s yours!).
Database credentials
Do not use your Atlas account credentials. Do not use special characters: only letters and numbers. No spaces.
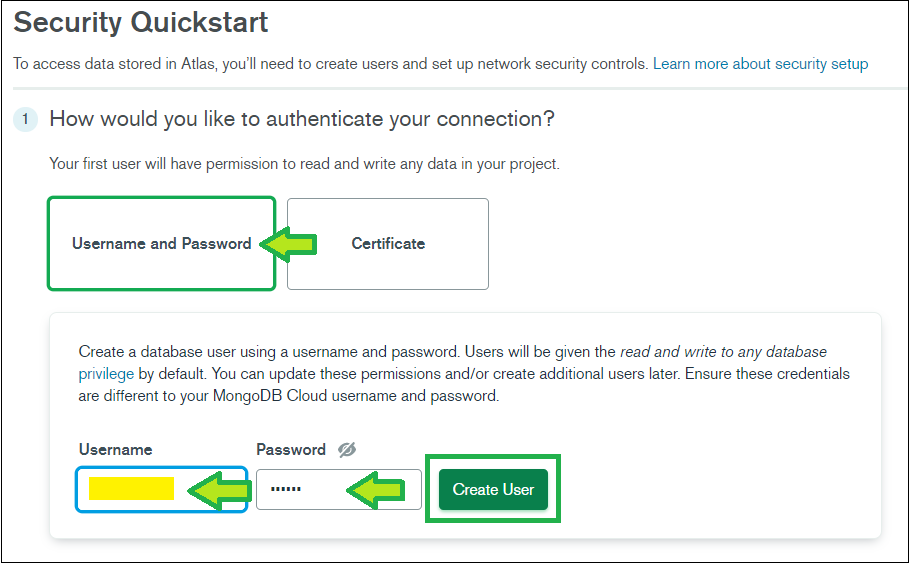
Write down the password in the line below (yes, in this browser window you’re reading now, unless you’re reading a printed version). You’ll need it later.
Database password (write here ->) |
|---|
Then click Create User.
f) Select My Local Environment and in the box My IP address write 0.0.0.0/0 (mind these are all zeroes, not the letter O)
Warning
If you don’t allow access from anywhere (IP 0.0.0.0/0) Nightscout will not be able to access your database.”
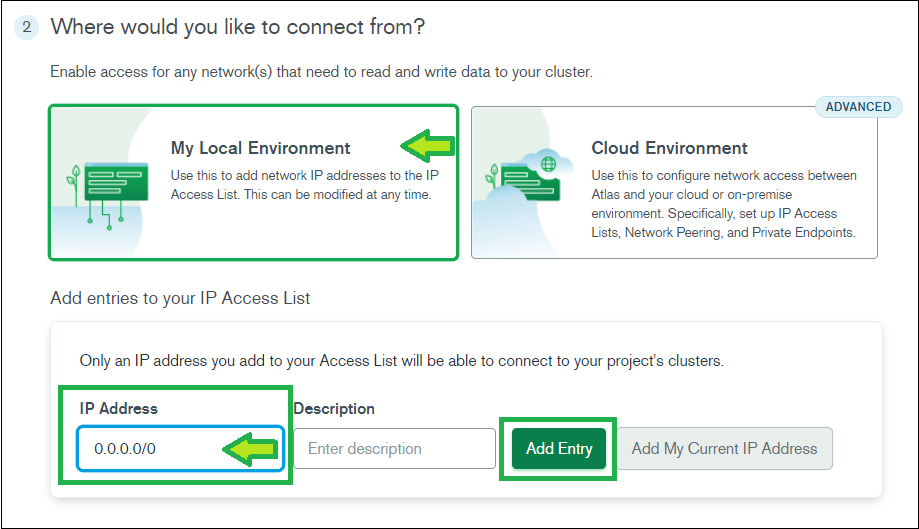
Then click Add Entry.
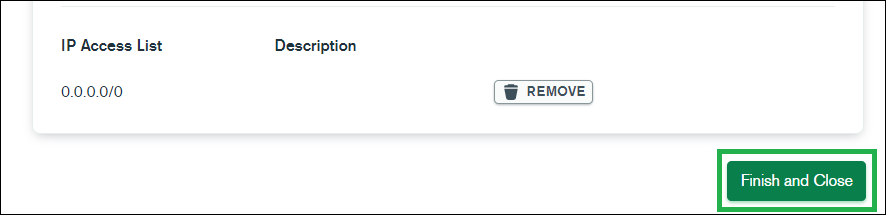
g) Click on Finish and Close
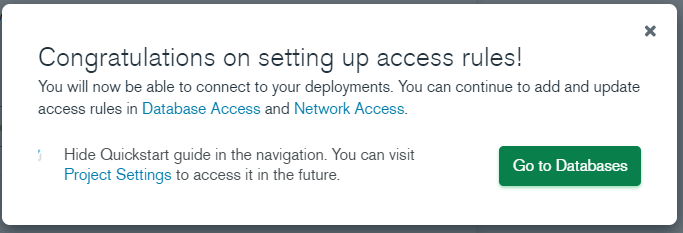
h) Click on Go to Databases
i) Atlas will create your default cluster, it can take more than 3 minutes
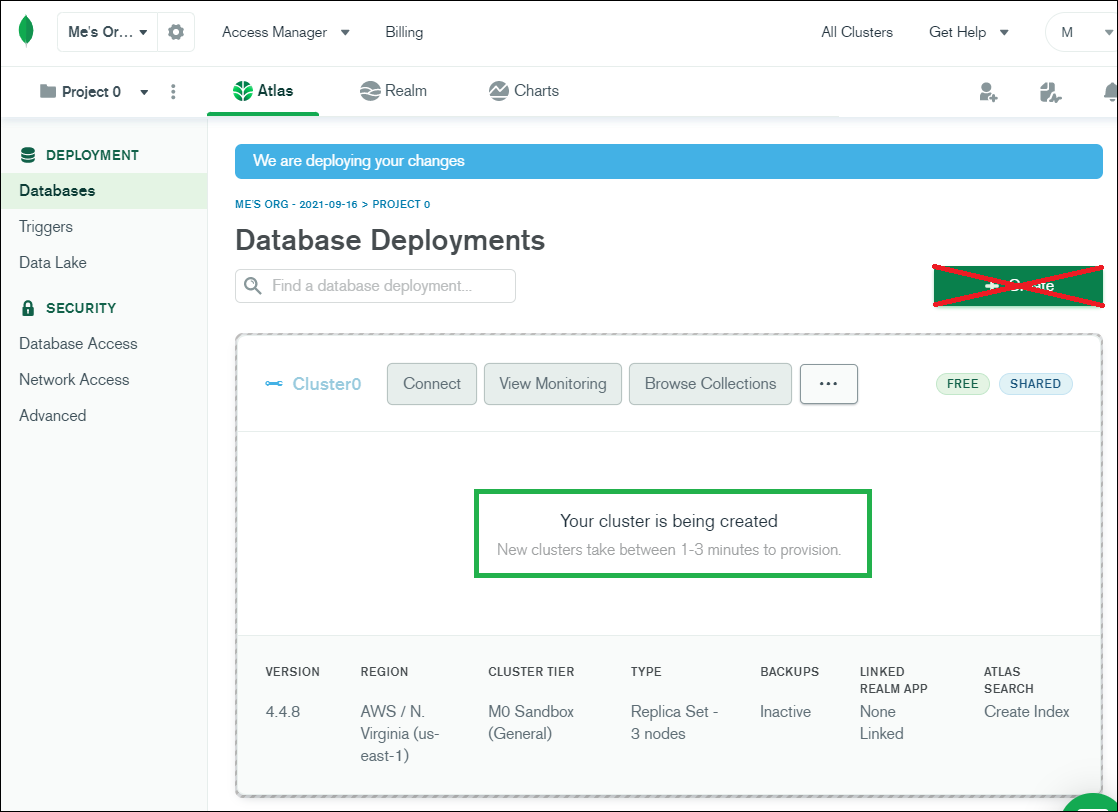
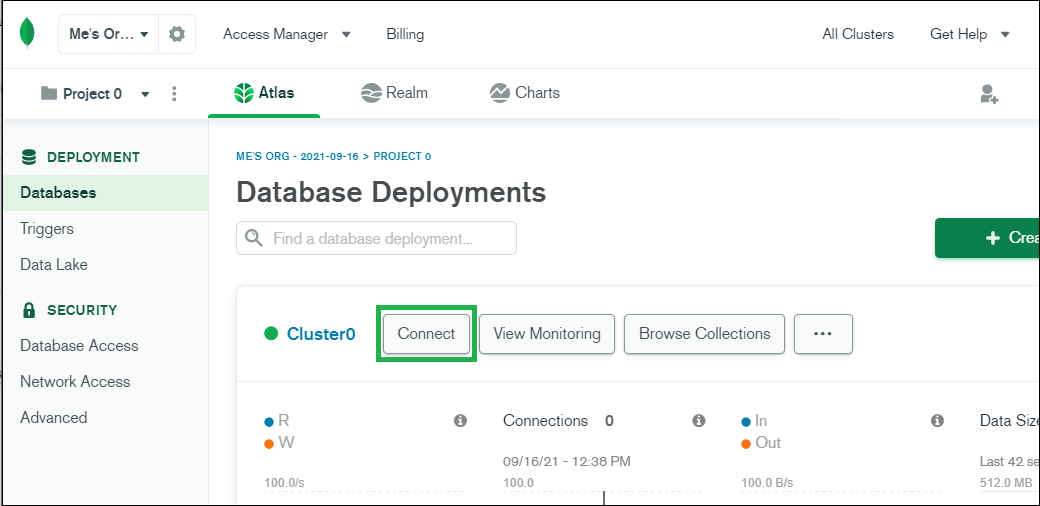
j) Click on CONNECT
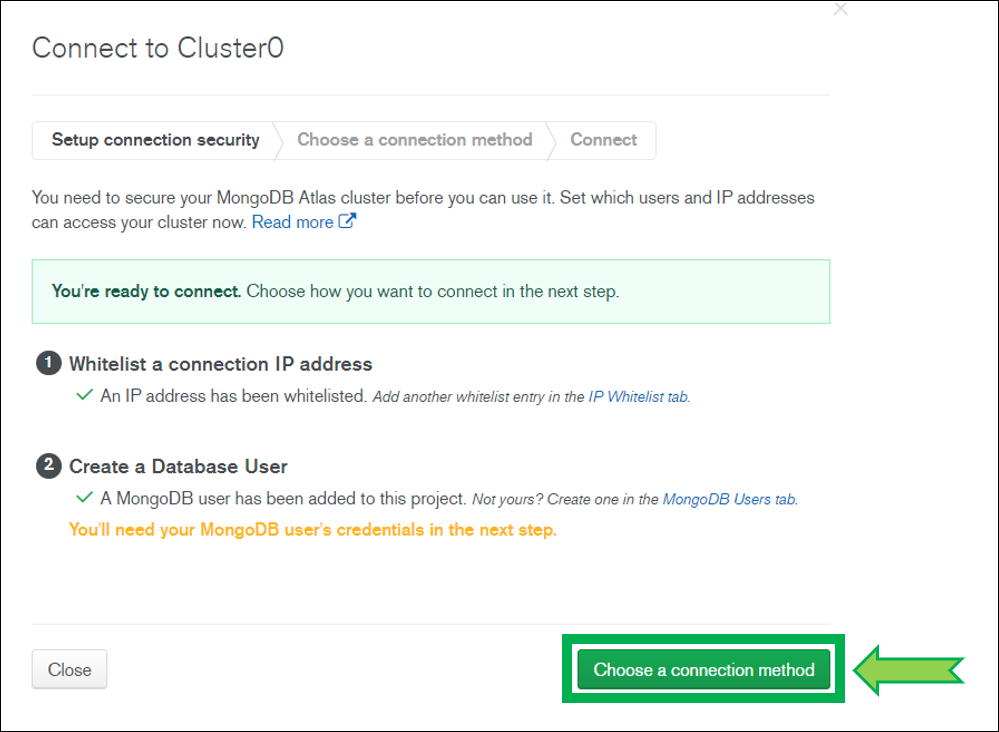
k) If displayed, click on Choose a connection method (else skip)
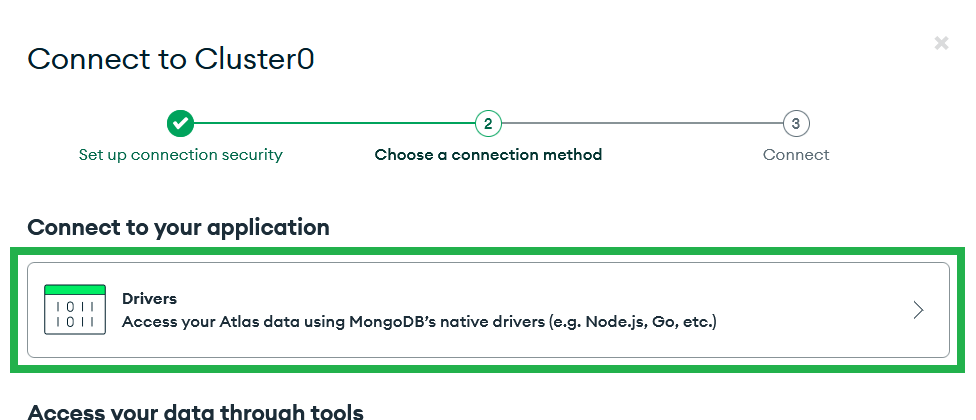
l) Select Drivers
m) Scroll down (do not change any value) and copy the connection string: click Copy and paste it somewhere to edit it (like Notepad).

n) Paste the string in the line below (yes, in this browser window you’re reading now, unless you’re reading a printed version).
(paste here ->)
Hint
It should be similar to this (xxxxx will be different):
mongodb+srv://nightscout:<password>@cluster0.xxxxx.mongodb.net/?retryWrites=true&w=majority
o) (Optional) Invent a name for your database, this is not a critical information (for example myCGMitc). Only letters and numbers, no spaces.
Database Name (write here ->) |
|---|
p) Click on the button Generate (just here below this line: in this browser window you’re reading):
The connection string will appear here
Warning
Keep this string safely aside, it is called your MONGODB_URI
p) If you want to do it manually: replace <password> with your database password as noted previously (in the example below soo5ecret) and <dbname> by any text you want, say mycgmic for example. The result will be like this:
mongodb+srv://nightscout:soo5ecret@cluster0.xxxxx.mongodb.net/myCGMitc?retryWrites=true&w=majority
Hint
There should be NO < and NO > characters in the final string, neither for password nor for database name.
You have completed a MongoDB Atlas database creation.
Now that you have copied the resulting MONGODB_URI string to a safe place, go back to the instructions page you were following.